Signature Scanner & Resizer Online: How to Scan, Crop, Resize and Compress Your Signature for Exam Forms
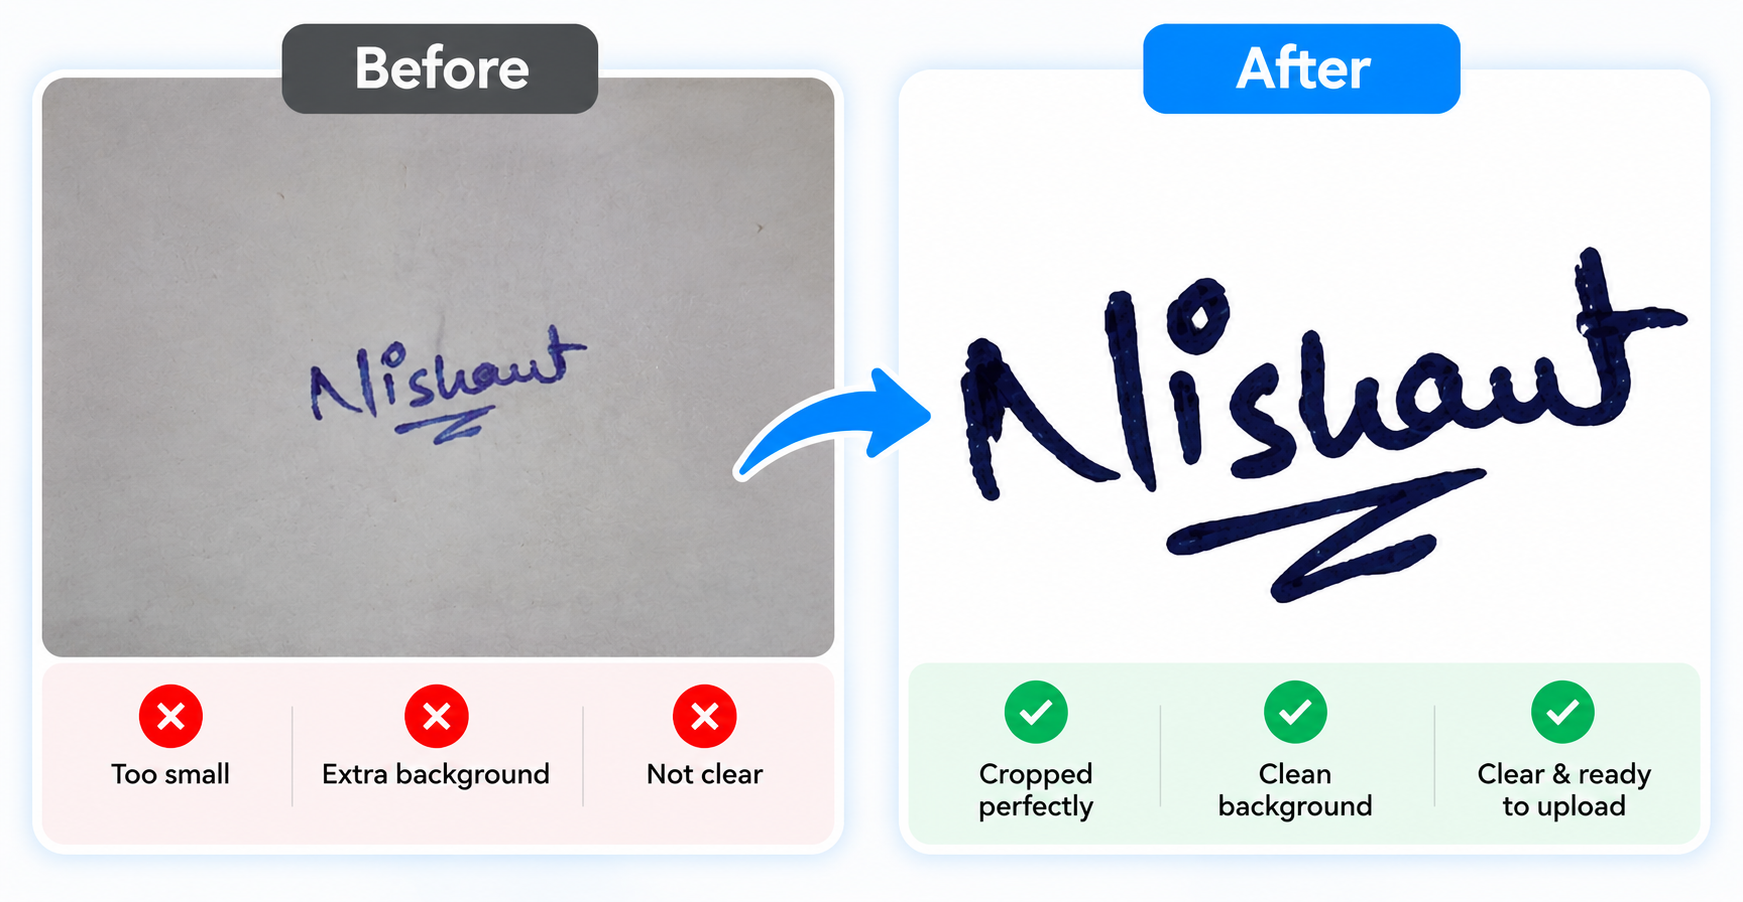
Recommended: upload a photo of your signature and let the tool below auto-crop, clean and resize it.
Signature Scanner
Upload a photo of your signature, crop it, and it's auto-cleaned instantly. Dimensions & file size below are optional.
Processed in your browser. Always confirm the final signature against your exam's official notification before submitting your application.
Signature Scanner Online: Prepare Your Handwritten Signature for Exam Forms
Uploading a signature to an online examination form sounds simple until the application portal rejects the image because it is too large, too small, blurred, poorly cropped or outside the prescribed file-size range. Candidates often have a perfectly valid handwritten signature, but the digital image created from it does not match the portal's technical requirements.
A signature scanner and resizer can turn a handwritten signature on paper into a clean digital image. A useful workflow should do more than scan: it should remove unnecessary white space, crop around the actual signature, resize the image, compress it to the required file size and preserve enough clarity for the signature to remain readable.
This guide explains how to scan a handwritten signature, crop it correctly, resize and compress it, and prepare it for common Indian exam application portals.
Why Do Online Exam Forms Reject Signature Images?
Most problems happen because a physical signature and a digital signature image are different things. A candidate may sign correctly on paper, but the image can contain a large amount of blank paper around the ink. That blank area becomes part of the uploaded image and can make the signature appear miniature.
Another common problem is compression. If a photograph of the signature is compressed too aggressively, thin strokes can become faint or blurry. If the image is saved at unnecessarily high quality, the file may exceed the portal's maximum size.
Dimensions are also important. Some application systems specify pixel dimensions or physical dimensions at a particular DPI. Therefore, simply taking a picture of a signature and uploading it is not always enough.
What Is a Signature Scanner?
A signature scanner is a tool that converts a handwritten signature on paper into a digital image suitable for online use. In an exam-application workflow, it becomes much more useful when combined with automatic cropping and resizing. Instead of manually opening an image editor, selecting the signature, removing blank paper, entering pixel dimensions and repeatedly changing JPEG quality, the candidate can complete these steps in one workflow.
How SahiPhoto's Signature Scanner Works
- Upload your signature — take a clear photo or scan of your handwritten signature on plain paper.
- Detect the signature — identify the darker ink region against the lighter paper background.
- Remove blank space — automatically crop around the actual signature.
- Straighten — rotate the image if it was photographed at an angle.
- Resize — apply the dimensions required by the target exam or a custom size.
- Compress — reduce the file size while keeping the signature clear.
- Preview — check the final image before downloading.
- Download — save the JPG/JPEG ready for the application portal.
UPSC Signature Requirements: What Candidates Should Know
UPSC's Examination FAQ says candidates should have their photograph and signature scanned in JPG format, with each file between 20 KB and 300 KB, and clearly visible. It also describes the signature as being placed on white paper using a black ink pen. Always verify the current examination notification before submission.
An important point is that a UPSC signature upload is not simply about making the file small. The signature must remain clearly visible while satisfying the technical requirements of the particular application.
SSC Signature Size and Format
SSC's 2026 Constable (GD) notice specifies a scanned signature in JPEG/JPG format with a file size of 10 KB to 20 KB and an image dimension of about 6.0 cm × 2.0 cm at 300 DPI. It also says the signature should be horizontally aligned and warns that blurred or miniature signatures can be rejected.
This demonstrates why a signature workflow should crop first, resize to the required proportion, and then compress into the specified file-size range.
IBPS Signature Upload Requirements
IBPS's current CRP Customer Service Associate-XVI scanning guidelines ask applicants to sign on white paper using black ink. The preferred signature dimensions are 140 × 60 pixels and the file size is 10–20 KB. The signature should not be written in capital letters.
The same guidelines instruct candidates to scan at a minimum of 200 DPI, crop the image to the edge of the signature and then use the upload editor to reach the final size. They also warn that unclear or smudged signatures can lead to rejection and that the uploaded signature should match the signature used later at the examination.
Signature requirements are not the same for every exam. UPSC, SSC, IBPS, NTA and other authorities can publish different dimensions, file-size ranges and formats — there is no single size that works everywhere. Always verify the latest official notification before uploading.
How to Scan a Signature Using Your Phone
- Take a clean white sheet of paper.
- Use the ink specified by the examination.
- Write your normal signature naturally.
- Place the paper on a flat surface with good lighting.
- Keep the phone directly above the paper to reduce perspective distortion.
- Make sure there are no strong shadows over the signature.
- Take the picture at the highest practical quality.
- Upload it to the signature scanner and crop the blank area.
- Check the preview before resizing and compressing.
Why You Should Not Sign Directly on a Phone Screenshot
A screenshot or digitally drawn signature may not satisfy an examination that specifically asks for a handwritten signature. The safer workflow is to create the signature on paper according to the examination's instructions, scan it clearly, and then prepare the resulting image for upload. Never use another person's signature.
How to Crop a Signature Correctly
The goal of cropping is to remove unnecessary paper, not to cut into the ink. Leave a small amount of clean space around the signature so no stroke touches the edge of the final image.
Excessive blank margins can make a signature look miniature. An excessively tight crop can make it appear clipped. Automatic signature detection can help calculate a balanced crop — the crop-padding slider in the tool above controls exactly this.
Signature Resizer vs Signature Scanner vs Signature Compressor
What each one does
- Signature Scanner: converts a paper signature into a digital image.
- Signature Cropper: removes blank paper around the signature.
The other half
- Signature Resizer: changes pixel dimensions.
- Signature Compressor: reduces file size while trying to preserve clarity.
Why Your Signature Looks Too Small After Upload
- Too much blank paper is included around the signature.
- The original photograph was taken from too far away.
- The image was resized without cropping first.
- The signature itself is very small on the paper.
- The portal scales the complete image into a fixed preview box.
Why Your Signature Looks Blurry
- The original image was out of focus.
- The photograph was taken in poor lighting.
- The image was compressed too heavily.
- The scan resolution was too low.
- The signature was enlarged far beyond its original resolution.
- The portal compressed the image again after upload.
How to Reduce Signature File Size Without Making It Unreadable
- Crop blank space first.
- Resize to the dimensions requested by the examination.
- Use JPG/JPEG when required.
- Reduce JPEG quality gradually instead of immediately choosing very low quality.
- Preview the compressed image at normal size.
- Check the final file size in KB.
Black Ink or Blue Ink: Which Should You Use?
The correct ink depends on the examination's instructions. The current IBPS example specifically asks for black ink on white paper. Other examinations may specify differently, so candidates should follow the exact current notice.
Common Signature Upload Errors
- File exceeds the maximum KB limit.
- File is below the minimum KB limit.
- Wrong format such as PNG when JPG/JPEG is required.
- Signature is too small inside a large white canvas.
- Signature is clipped at the edge.
- Signature is blurred or smudged.
- Signature is not horizontally aligned when alignment is specified.
- Signature is written in capital letters where prohibited.
- Wrong image uploaded in the signature field.
- Candidate follows an outdated specification.
How to Fix a “Signature Too Small” Error
- Return to the original scan or photograph.
- Open the signature scanner above.
- Let it automatically remove unnecessary blank paper.
- Check that the complete signature is inside the crop.
- Resize to the target dimensions.
- Compress to the required KB range.
- Download the new image.
- Preview the file again before uploading it.
Can SahiPhoto Guarantee That a Signature Will Be Accepted?
No. A signature tool can prepare an image according to technical settings, but the examination authority ultimately controls acceptance. There may be additional rules about ink, handwriting, dimensions, file format, file size, clarity, alignment or matching. The latest official notification remains the final authority.
Why an Automatic Signature Scanner Is Better Than Manual Editing
- Less manual cropping.
- More consistent results.
- Faster preparation.
- Exam-specific presets.
- Clear preview before download.
- Convenient for candidates working from a phone.
Final Signature Upload Checklist
- Signature belongs to the applicant
- Correct ink/handwriting instructions followed
- Clean background
- Complete signature visible
- No excessive blank space
- Signature not clipped
- Sharp and readable
- Correct JPG/JPEG format
- Correct dimensions
- Correct file-size range
- Correct orientation where required
- Latest official notification checked
Frequently Asked Questions
Sign on paper according to the exam's instructions, photograph or scan it clearly, crop the unnecessary paper, resize it and compress it to the required file size.
First crop the blank area around the signature and then resize the cropped image to the dimensions specified by the exam.
Crop unnecessary blank space, resize to the required dimensions and gradually reduce JPEG quality until the image falls within the specified range while remaining clear.
The current SSC Constable (GD) 2026 notice specifies 10–20 KB in JPG/JPEG and about 6.0 cm × 2.0 cm at 300 DPI. Check your specific SSC notice.
The current IBPS CRP Customer Service Associate-XVI scanning guidelines specify 140 × 60 pixels as the preferred signature dimensions and a 10–20 KB file size.
UPSC's examination FAQ states that photograph and signature files should be in JPG format, between 20 KB and 300 KB, and clearly visible. Check the specific examination instructions.
Yes, if the resulting image is clear and satisfies the examination's specifications. A phone camera can work when the paper is flat, well lit and photographed without shadows.
File size is only one requirement. The image can still be rejected because it is blurred, miniature, incorrectly cropped, incorrectly formatted or otherwise inconsistent with the current instructions.
You can start from the same original signature, but separate versions may be needed because different exams can specify different dimensions, file sizes and formats.
Follow the exact examination instructions. Some application guidelines, including the current IBPS example, explicitly state that signatures in capital letters are not accepted.
Related SahiPhoto Tools
This article is for general guidance only and is not affiliated with UPSC, NTA or any examination authority. Requirements can change — always verify the current photo specification against your exam's official notification before submitting your application.